|
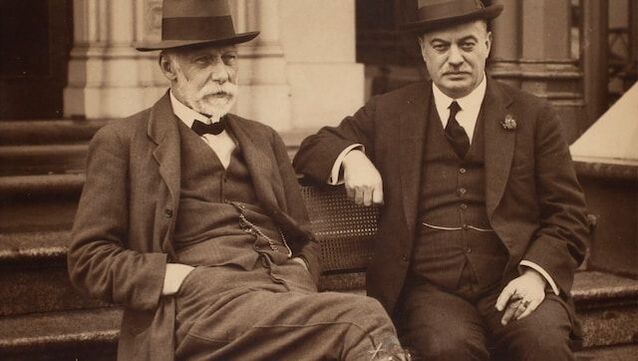
Transforming old photos into timeless art can be an enriching and rewarding process. For seniors, it provides a beautiful walk down memory lane, breathing new life into treasured times from the past. This art brings forward nostalgia and can imprint your legacy in a brilliant way. Through careful restoration and creative display options, once-faded images are revitalized, acting as a timeless narration of one's life story. Seniors can use our tips to create timeless art. 12 Steps to Transform Old Photos Into Art for SeniorsPhoto restoration can help you preserve your pictures and offers an engaging medium to relive precious memories. Here are 12 steps to transform old photos into timeless art for seniors. Step 1: Identify and Gather Your Memories Identifying and gathering your memories is the first key step. Dig into those dusty boxes in the attic or basement, re-discover treasured family albums, or explore through old postcards. Look for photos that spark joy and nostalgia—images that tell engaging stories about your past. Step 2: Clean the Clutter Cleaning the clutter constitutes a crucial part of preserving and transforming your photos into timeless art. Before diving into any digitization or restoration process, ensure your materials are clean. Gently remove dust particles with a soft, lint-free cloth, and try not to scratch the surface. Step 3: Digitize Your Treasures The next step involves converting your physical snapshots into a digital format. This process uses a high-quality scanner to capture your old photos without losing their original charm. The digitization ensures longevity and allows for easy editing, enhancing, and sharing of photos. Step 4: Remove Photo Backgrounds Here, the focus shifts to amplifying the primary subjects in your photographs. The power of digital software comes into play for the instant removal of photo backgrounds. It significantly helps unify your art collection, putting more emphasis on important people and places. Step 5: Renovate Your Photos Next, you’ll want to mend imperfections in your old photos by using professional techniques. These procedures fix tears, remove stubborn stains, and correct faded colors. This restoration breathes new life into your photos and ensures their longevity for continued enjoyment. Step 6: Enhance Images Using Photo Filters By subtly applying artistic and dynamic filters using advanced editing software, you can add vibrancy to your images while preserving their original charm. Take advantage of these tools to transform faded memories into vibrant timeless art pieces that tell your unique story. Step 7: Convert into Monochrome for an Antique Look When you convert into monochrome for an antique look, you can give your photos a touch of a bygone era. Change your enhanced photos into monochrome or sepia tones. This step gives your pictures an old-world charm, transforming them into timeless pieces that narrate your story. Step 8: Add Descriptive Captions Bring in the emotional value to each photograph by writing short descriptions or anecdotes that go with them. These labels also serve to enrich the storytelling when shared with friends and family. It's a charming way of making your photo art more meaningful and deeply personalized. Step 9: Design Thoughtful Layouts Think about how your restored photos will be displayed. Whether in digital albums or printed collections, the careful arrangement of images can create a narrative. Group photos together that tell a story, as your thoughtful layout will engage and guide them through your journey. Step 10: Consider Professional Printing When considering professional printing for your photos, keep in mind the difference it can make to the final output. Professional print shops offer high-quality paper, photo printers, and superior printing techniques that give your images a glossy texture and the perfect finish. Step 11: Create Hanging Tapestry and Photo Blocks This phase introduces an innovative approach to displaying your photos. Transforming your restored images into a hanging tapestry or photo block gives your collection a three-dimensional feel and turns them into pieces of art. This exciting twist adds new depth to your room decor. Step 12: Arrange And Enjoy Your Artistic Display Carefully place your photos in chosen locations around your home. The placement should complement the overall design scheme of your house, creating a harmonious decor. Then, sit back and enjoy the physical manifestation of your journey through life—your timeless photo art. In Conclusion…Embrace this journey of transforming old photos into timeless art. Every picture holds a story that deserves to be told and cherished in unique ways. Uncover the tales hidden within your faded photos and convert them into enduring masterpieces, enhancing your home's ambiance.
0 Comments
Your comment will be posted after it is approved.
Leave a Reply. |
Archives
July 2024
Categories
All
|
Employment Resources |
Creating Income |
Most Read Pages |
Resources/Info |
|
Copyright 2022 by Retired Brains
|
Disclaimer: We do our best to ensure the information on RetiredBrains.com is accurate and updated at all times; however, we are unable to guarantee the accuracy of all information. We make every attempt to keep the content up to date and factual. For the most current and complete product/service details please verify with the merchant, product, issuer, or service directly via their website or during the buying or application process. Please be aware that RetiredBrains may have a financial relationship with some of the sites included on our Website. RetiredBrains.com may receive compensation if users choose to click on the links located on certain pages of this website and sales and/or leads are generated. If legal advice or other expert assistance is required, the services of competent professional persons should be sought.


 RSS Feed